Monday, May 13, 2013

Grampie

Apologies for taking a bit of a blogging break. I meant to post after our Civil War event last weekend, but my dear Grampie passed from the world last Monday evening and in the whirl and flutter of various emotions since that time I have not been settled enough to write a blog post.

Now, as time goes on, I can take it all in. I can reconcile myself to it. I am still very sad, but now it is a methodical sadness. Not the wild burst of grief that has come in the night, sometimes. Not the tears that swell unbidden when I look at the faces of my children and know that they will never know their great grandfather, at least like I did.

It was not altogether unexpected. He was diagnosed with cancer a little over a month ago. And he was eighty-five. Still, I had hoped to be able to visit him this summer. To let my children meet the man who first showed me the world, barefooted on the beach, watching the waves fall over each other and wondering what lay beyond them. Thrilling to the idea that the ocean connected me to a completely different continent.  The doctor gave him 4-12 months. So his passing so soon was a bit of a shock.
Me and Grampie during his last visit to Illinois, over ten years ago. I think I'm 15 in this picture!

I am preparing a mourning impression for my dear Grampie for the remainder of the reenacting year. It may seem strange, but it does help to have something to *do*. Now that Grampie is gone and his memorial service is over and life seemingly must go on, it is nice to know that I have a job to do; I have things to research and make and I can outwardly show my respect for him, at least in some small way. It is relieving and comforting. Mourning is a process. I think the Victorians had it right; death seems such a quick thing anymore.

Since a woman in full mourning would not have gone into public beyond a very few occasions, I am researching a second mourning impression. The items I am making are not really very different than anything I might wear for "normal" wear, but they will reflect the mourning stage and will be appropriate for normal wear after mourning is over, although perhaps a bit more somber in color and more conservative regarding cut and trim.

I will update as I have things to update on. I'm working on my cage crinoline right now, since I do not have a suitable one to wear with my black dress (I will be using my black lawn for the summer.)
You can see David and his red flag here, and his litter-bearers. 

As for the Civil War reenactment, it was fun! We all had a lovely time and I am looking forward to going to more events as the season gets off to a start. It's nice to enjoy reenacting again! You can see more pictures here: Delevan Civil War Days 2013

Love,
Sarah

Friday, May 3, 2013

1860's Boys Button Suit and Coat

Dear Father, hear and bless


Thy beasts and singing birds


And guard with tenderness


Small things that have no words. 


My little son is growing up. I love him so.

Love,
Sarah

Wednesday, May 1, 2013

New 1860's Corset and Chemise

Every time I finish a corset and then put it on, I think to myself that there really isn't anything happier to sew than a corset. It's so thrilling to see how it changes your natural shape and makes you look suitable for a period of history. Corsets and other underwear is what really makes the silhouette. The dresses are just icing on the cake.

Anyway, two years ago I made this grey linen corset. I made it from the popular Simplicity 2890 pattern, from famous corsetiere Kay Gnagey. I made it exactly according to the pattern and purchased a kit from Kay Gnagey that came with the necessary supplies and it came out really nice; I really liked the hip flare since it made my waist look smaller by comparison and the cut of it, with gussets, was extremely comfortable. 

However. As I wore it, the less I liked it. Sure, from the waist down it was great. But the bust support (or lack thereof) became more of a problem. The spiral steels that supported the front bust seemed to collapse a bit; the whole front of the corset seemed to sort of wrinkle downwards and by the end of the day I often took my dress off to discover my bust was happily flopping over the top of the corset and the corset had done nothing to support me at all. 
In this pic from two years ago you can see the problem I am talking about - a very low bustline that, probably, was spilling over the edge of the corset when this picture was taken. 

Last year I was pregnant so I didn't bother making a new corset. This year, though, I really need a new one. I thought I'd go back to the Laughing Moon Dore Corset since it was so good for me in the past. However, the mock ups I made I just didn't like. There just wasn't much shaping. I didn't want to fool with that pattern anymore. I tried the Light French Corset from Corsets and Crinolines and had similar results (maybe the gored pattern shape just isn't good for me anymore? But strictly speaking there really is no difference in finished shape between a gored and a gusseted corset; you can fit a gored corset to fit exactly like a gusseted one.) 

I decided to go back to Simplicity 2890. The hip and waist were perfect already; I just needed to do some major reworking of the bust! In the end, it was a very simple adjustment. I cut up my grey linen corset and traced it anew to get the pattern (since I could not find my old copy of the pattern) and slashed across the midriff area and spread it 1.5". I then added another 3/4" to the top edge of the front of the corset, tapering to the original top edge at the side seams. I ordered a busk 2" longer than the original bust (14" instead of 12") and made up the corset in white cotton twill, double layered, with zip ties for boning. This time, I just put the boning where I thought I'd need it instead of following the original lines of boning on the grey corset. 

I also decreased the width of the bust gussets to give a firmer, tidier line to the bust instead of having big bust cups that let the bosom spill into each armpit! 

And so, the finished result: 

I am SO happy with how it came out. It is just as comfortable as the grey linen corset but it gives really good bust support and I won't have to worry about my bosom flopping out over the top of it! 

The odd thing is, it doesn't really decrease my waist measurement that much. It does, a little. But you can see from the side that the view  from that angle is quite thick. If I put on one of my 1860's dresses I can easily fasten the waistband but putting it on over the corset it just barely hooks. I think this has to do with flesh displacement and the fact that the corset firms up your waist so you can't "squish" it when you are putting something on over it. 

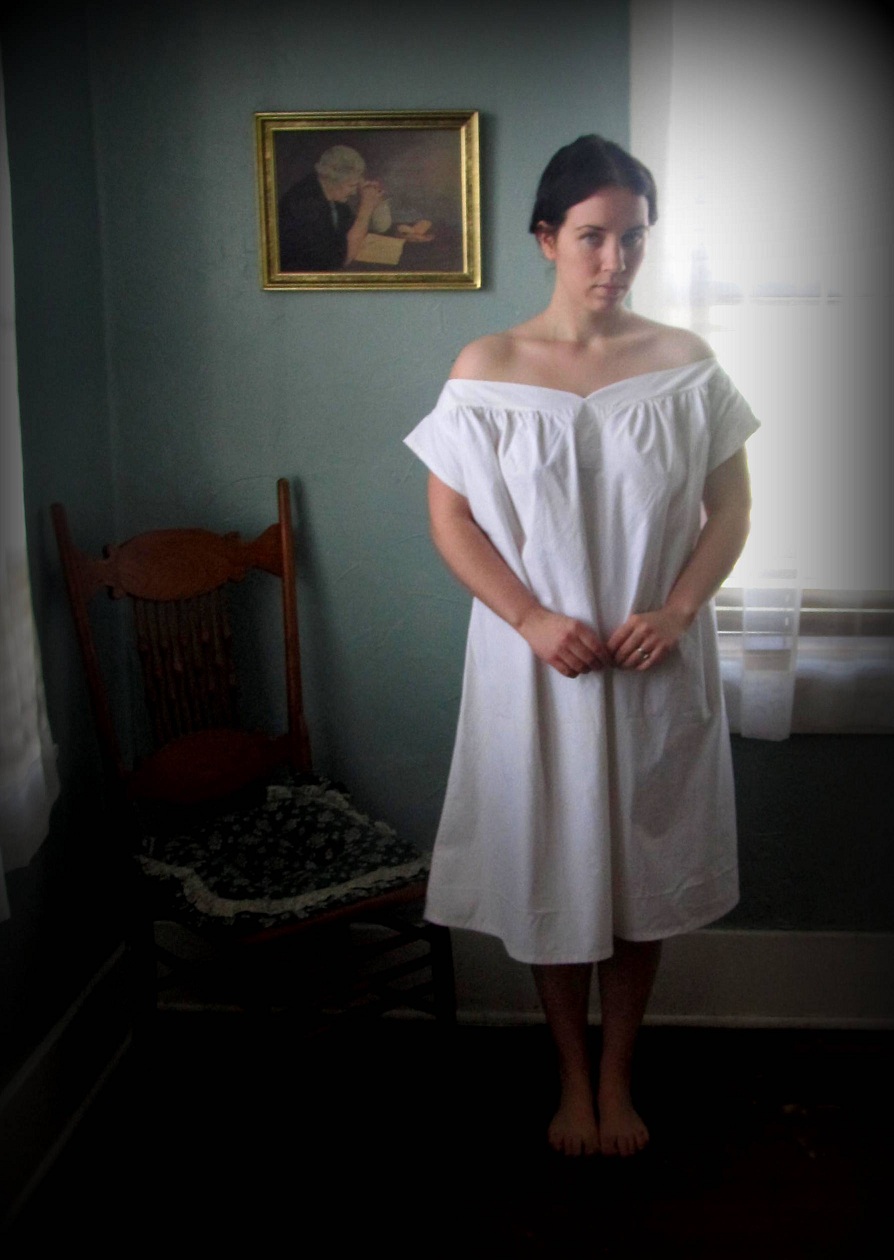
I also made a new chemise from the pattern included in Simplicity 2890. I used a cotton sheet to make it so I think it will last quite a long time. I have needed a new 1860's style chemise for a few years now. My old ones were literally falling apart! Quick thought on the chemise pattern: If you have normal shoulders it will be very off-the-shoulder. I made it up exactly according to the pattern and the yoke was enormously wide. I had to take a tuck at the center back neckline, bringing in the width about 2", to make it fit. Even so, it is still very, very off-the-shoulder. 

Today I think I will start my cage crinoline. I need to play around with the dimensions before actually constructing it but I don't think it should take too long. I'll leave you with this picture of Baby Anne and The Violet. 

Oh, and a thank-you to Judah for all the pictures of the new corset. (he has decided it is fun to take photos for Mommy and then asks for money afterwards. Right now he is happy with 50 cents but I am afraid as the years progress he'll decide his skills are worth more monetary reward.) 

Love,
Sarah

Monday, April 29, 2013

David's Confederate Surgeons Uniform

Wow, it's done. At times I thought it would never be done. It was becoming the Never-Ending-Shell-Jacket-of-Doom. Not in a terrible way, but in a way that became more and more annoying. Actually, it only took a week from draping the pattern to having the coat finished so it isn't that bad, but still. It's the mental strain of it all. Especially when the event your husband needs to wear it to is less than a week away.

And so now it is done and I am sad because it was, after all, enjoyable to work on and to envision the end result while I was stitching away at the buttonholes or quilting the Never-Ending-Lining-of-Doom.
I have told David he is my creation and I have made and molded him into what he is in the reenacting world. Without me, he would be nothing. Of course, he is not as keen on that idea as I. And yeah, he has the historical knowledge and physical ability to take what I sew and make an honest-to-God impression out of it.  But still, his looks have certainly improved since I first met him and he was wearing a horribly fitted, blanket-weight wool sutler bought uniform with zig zag stitching and uneven seam allowances. He is honestly the most horrible person in the world to sew for since he is so picky and so critical but hey, he's really helped me develop my skills over the years, and that is worth a lot. 
I made the trousers a few weeks ago and the waistcoat was quickly made over the weekend so we could head out yesterday afternoon for some pictures at a lovely local wooded park.

The boys yelped with glee on the playground, the baby wailed when I set her down in the grass to take photos of her Papa and David looked stern and annoyed.

It seems whenever I do take pictures of him in a period outfit he assumes that angry look. I promise you, he does not typically look so upset. I told him to try to look happy.
Oh my gosh though he does look so adorable here. After almost 8 years of marriage it's awesome to be married to a guy who gets hotter as the years pass. 
He tried.

The completed outfit is composed of three main garments; the trousers, the waistcoat, and the jacket. The trousers are of dark blue wool kersey with a 1 1/4" black velvet stripe, edged in gold piping, sewn down the outside legs of the trousers. The waistcoat is a civilian notched collar style, made in Richmond grey wool broadcloth (made military-esque by the use of droop-wing Eagle Confederate buttons) and the coat is a shell jacket style made in the same Richmond grey broadcloth and faced with black broadcloth at the center front and with black cuffs and collar.

The trousers are made according to Confederate regulations. There were no regulations for waistcoats (as they were often a private purchase item; made to personal specifications) and the shell jacket is inspired by the many original examples of these kinds of coats that are still in existence, though the shell jacket was not a regulation style.

So what makes this uniform a surgeons uniform? I had no idea when I first began researching this project earlier this year. Now I know that there are 3 things that define this uniform as a surgeons.

The first is the black velvet and gold piped stripe on the trousers. That was a feature unique to the Confederate medical department. For our stripe we used cotton velveteen and metallic gold piping.

The second feature is the black cuffs, collar and facing on the jacket. Every branch of they army had their own defining color and the medical department was specified to be defined by black. According to regulations the jacket was to be a "tunic" (frock coat) faced and edged with black with collar and cuffs of black. Since this is not a frock coat we did not pipe the edges in black but David plans on having a future Confederate surgeons frock coat made with black piped edges.

The third feature is the green wool sash. This is copied from the United States Army. While a sash was not always worn, it does look nice for dressier occasions and green is a color more people can easily recognize as being a "medical color".
The belt buckle is Federal, but would not have been uncommon in the Confederate army. 

The stars on the collar marks the rank of officer.

In David's case, a full surgeon of the Confederate Army was ranked as a Major. The three rows of gold braid on his kepi also indicate his rank. The double breasted style of coat indicates that he is an officer although it does not indicate exactly what rank he is.

Braid on the sleeves was often worn and also indicated rank, but we chose not to add braid to this coat since David plans on using it for his heavy-duty field use coat. This will be his fatigue uniform; the frock coat we will make later we will make according to the regulations and it will have the sleeve braid.

The coat, combined with the waistcoat, can be worn in a variety ways. Confederate coats certainly had more  bling than Federal coats. For most of the pictures we took yesterday David had his coat worn with the facings turned back and buttoned so you can see his waistcoat underneath. The sash and belt are worn over the waistcoat and the jacket is put on over top.

But it can also be worn (and I prefer it this way, to be honest) buttoned snugly shut, with the sash and belt worn at the waist of the jacket.

And here it is, with no sash and belt at all. Here it looks very plain.

While the kepi looks nice with the uniform, David also plans to wear his black wool felt civilian hat with a twisted hat cord. For very hot events he has a plain straw hat he can wear with a hat cord that will also look nice with the uniform and give it a completely different look.

So my big huge sewing project of the year is done! It's a relief and a satisfaction yet I'm a bit sad that I don't have anything so exciting to work on anymore. We will be going to our first event this weekend so now I must turn my attention to finishing my new corset (it just needs the grommets set; but I cannot find two piece grommets ANYWHERE! Wal Mart, Jo Anns, Hancocks and Hobby Lobby all used to sell them and now they only sell the one piece eyelets. I'm going to Tandy today in hopes I can find some there. If not, I'll have to work the eyelets by hand) and finishing Judah's new button suit. I have materials for a cage, too, but I don't know if I'll have time to get it done before Saturday. We'll see! Maybe!

Love,
Sarah

Tuesday, April 23, 2013

A Red Hospital Flag

I have been busy working on David's uniform and, with characteristic procrastination once again attempting to thwart me, have been busy as well trying to get all of us decently attired for a reenactment next weekend. I   am in dire need of a new corset and cage and Judah needs a new outfit. There are several small projects I need to accomplish as well - a bit of mending, retrimming and refitting as clothes from the larger children get passed down to the smaller ones. 

I sewed this flag for David quite a while ago but only recently put in the eyelets to attach the ties. Although it was rainy this morning I was able to take it outside to finally see how it looks. It is hard to get a good picture of a flag when it is lying in all its flat largeness on a table or folded up and put away. I am really happy with how it looks and am excited to see David use it for his impression this year. 

It is made of several long strips of red wool bunting, which is a lightweight, thick-threaded, tightly woven material. I had never worked with it before but it was, as most wools are, very easy to work with. The construction was extremely simple - sew the strips together, fell the seams and hem all around the edge of finished 4' x 6' flag. A header of cotton canvas was attached to one end and three eyelets worked with hemp thread for ties. 

Plain red flags (among several other kinds) were used by the Confederate army to designate field hospitals or aid stations. David prefers to portray an aid station, which was an area wounded men could come to for treatment before being sent on to the larger field hospital and then, if needed, to an even larger general hospital. 

The Manual of Military Surgery for the Confederate States Army, published in 1863, spoke of the use of the red flag: 

"When the troops deploy or form for action, the 

surgeons, with their assistants and pack-horses, move 

a short distance to the rear, out of the range of the 

shot, and they establish there the field infirmary. It 

would be convenient if some house coul
d be used for 

this temporary hospital. 

Where this can not be had, the shade of trees or the 

shelter of a hill-side will answer the temporary 

wants of the surgeon. If the body of troops about 

entering into battle is a large one, with an extended 

line, several of these points should be selected and 

marked by a suitable red flag, which designates the 

spot where those slightly wounded can seek surgical 

aid. "

Red flags had also been used prior to the War to designate hospitals in both the U.S. Regular Army and some European armies. In Echoes of Glory, Arms and Equipment of the Confederacy, an original red hospital flag can be seen on p. 276. Like the one I made for David, it appears to be pieced of several long strips of material. 

I'm looking forward to seeing the flag in action this year. It attaches to the pole with leather ties. The leather "grips" the wood so the flag does not slip down. I think it will set off David's field hospital/aid station quite nicely. 

Back to intense sewing! 
Love,
Sarah


Monday, April 8, 2013

A Greenish-Blue Dress for the Wedding

I hope you all had a good weekend. It was warm and lovely and we spent much time outside revelling in the sun and the wind and walking barefooted upon the greening grass. Well, Anne did not much care for the greening grass, at least touching it with her feet.

In fact, she did not really care to have any physical contact with the natural world but consented to gloomily tolerate it from the safety of my arms.

I hope we can remedy that over the summer. A child of mine who does not like to be outside?

I was also able to work on the dress for the wedding and although I didn't quite finish it I do not have much more work to do to it before it is wearable. So, here is the fabric; a lightweight knit. Probably something nasty like polyester. But it was cheap.

I printed out the Tanit-Isis pattern, carefully taped the pieces together and then tried to determine which size to cut. Based my measurements, I should have cut a size M or L. But since the elastic shirring does not take up *that* much fabric I decided to cut a size XS for the width of the dress, but a size M for the shoulders and the kimono sleeves. It seemed to work out perfectly.

Of course, sewing the dress did not work out quite perfectly. I tried to fully line the dress with lightweight white fabric but it made the whole thing heavy and bulky so I had to rip the dress apart and take out the lining. I then resewed it but the machine kept skipping stitches if the seams were even slighly bulky - like the shoulder seams. So I had to do those by hand and then bound the seams by hand. I sewed the flat seams with a zig zag stitch and since the fabric wanted to stretch as I sewed it I have to go back and resew a seam for a few inches near the bottom of the skirt on one side as it looks puckery at the moment.

The part that *did* go smoothly was the elastic shirring. It was *so* easy and shirred up the dress to exactly the right size. I deviated from the original pattern in 2 ways. 1: I flared the skirt so it took up the whole width of the 60" wide fabric instead of cutting more narrowly as per the pattern. 2: I added tabs at the shoulder to pull the neckline into a sweetheart shape in the front. This is much more flattering for me since my bust size made the draped shoulders look rather ridiculous and out of proportion. I didn't add tabs to the back neckline, but I may.

I also added a long self fabric sash. It helps extend the look of the waist.

I really like how it looks although I have to admit it sort of reminds me of vintage night-wear. It has passed the approval of both my sisters though, one who is very modern in her sense of fashion and the other who is very conservative and painfully embarrassed by anything that is "revealing". Come to think about it, this dress is actually very 1980's. I have pictures of my mom and her friends at her wedding back in 1985 and pictures of my mom from her highschool years and many of the dresses had a similar feel. I also have a pattern from the 1980's that has a very similar style. So, who knows? It is what it is. But it's me.

I do wish my waist was smaller as this style makes it look huge but maybe I can make a girdle or something this week to wear underneath it and to help smooth things out.

I still need to find shoes to wear with it. And jewelry. I think I'll wear the green dress for the rehearsal dinner Friday night. So it wasn't a waste of money to get it.

A few more days! I'm so excited. I hope I don't cry at the wedding but I think I will. It's hard to believe my little brother is all grown up!

Love,
Sarah

Thursday, April 4, 2013

I Sewed With Elastic Thread!

First, thank you all so much for your really in depth advice about makeup. Based on your responses, I went out and got an eyeliner pencil, mascara and light colored eye shadow and some neutral lip gloss in a shade called "nude". I found some tutorials online about how to apply eyeshadow and basic makeup. So, I tried it all out. I got some ivory concealer and already had some clear powder.

I don't think I will use the 3 colors of eyeshadow the tutorial I found said to use. I got a package that had 2 colorways, each with 3 shades. I tried the lighter of the 2 colors using the various colors for browbone, eyelid and crease as per the tutorial but it was waaaaaayy too much. The very light violet by itself looks okay, and the eyeliner looks sort of okay (almost too much though) and the mascara looks okay. The lipgloss is a huge improvement over the lipstick - thanks for suggesting that! It's enough to make me look like I am dressed up, but hopefully not enough to make people stop and think "oh my gosh she looks so weird she doesn't normally look like that does she??"

Anyway, I also got some new fabric to make a different dress for the wedding. I had wanted to make my own dress anyway, but couldn't find fabric I liked/could afford and so in desperation I went out and got that bright green dress. It *is* a cute dress but guess what? I found some fabric I liked! And it was only $1.50 a yard in the Wal Mart bargain bin. It's a really pretty pale silvery-blue-green. It is super lightweight so I'm lining it and am making the Grecian Sundress from the free Tanit-Isis pattern.
It's so cute when she pulls up to a standing position because she looks impossibly tiny to be standing on her own two little legs. 

It calls for shirring with elastic thread - something I had never done before. I got the thread and was scared to try to use it. I like the shirred look but usually obtain that through other ways, like casings and elastic, or stretching-elastic-as-you-sew-it or something like that. I had a little bit of yellow calico left from a project I did this week for a friend from church and so I decided to try out the shirring technique on a small garment since it wouldn't be as big of a waste if it didn't come out right.

But it *did* come out!

I was excited and thrilled. I am still nervous about using it on my dress but I hope it comes out like I plan. If not, well, I always have the bright green dress I can wear instead.

For the dress I cut a narrow rectangle approximately double her waist measure in width and from her armpit to just below her knee in length. I hemmed the top normally and then shirred for about 4". I attached a ruffle at the bottom of the skirt (double the width of the skirt) and then made little ruffled shoulder straps to attach at the top. It seriously took an hour, maybe. So easy! But such cute results.

Love,
Sarah