Monday, June 23, 2008

Grierson Days in Jacksonville

A whole week and no posts! I meant to post again before we left for the weekend but was so busy getting everything done that I lacked time to do it. So, to make up for it, a rather lengthy post follows. . .

We left home Friday, a little after the noon hour, and wended our way to Jacksonville. It was a comfortable, two-hour drive and we arrived at the park with plenty of time to find an ideal site to set up camp and get out the tents and the fly to put up before evening fell. David’s mom and her friend Bob came with us and halved the A frame for their dwelling place. She had the west side and he had the east side. After setting up the A frame I was reminded of how much I love it! It is so much easier to put up three poles and stake the sides down that getting out the many poles and ropes that go with setting up our wall tent.

I had never been to the Jacksonville reenactment before. For the past four years or so I have been hearing great things about it and it is supposedly “THE” event to go to around here. I was anticipating a much larger event than we actually experienced but it was better organized than most other reenactments around here and the camps were laid out neatly without the crammed together, haphazard chaotic mess of tents you usually see.

We set up near the federal surgeon and had friendly neighbors in blue to our East. To our West was a cavalry unit that definitely was the unpleasant part of our sojourn. Everyone in that unit had a decidedly modern appearance, attitude and conversation and it seemed the women and children only dressed in quasi-period clothing for the battle and then changed back into modern clothing for the rest of the time. It was a little distracting but not nearly so much as the fact that the unit had a loud drunken party on Saturday night that lasted well into the wee hours of the morning. The bawdy talk and obnoxious laughter and shouting that seemed amplified to a great degree kept both David and I awake and miserable most of the night.

The next day David complained to the Union commander and he said he would speak to them about it, but that they were celebrating their 10th anniversary as a unit. Later that same day we talked to our friendly neighbors to the East and they said that that particular unit has a drunken party every year.

They were supposedly celebrating their 10th year”. David said to one soldier.
Yes, they were.” was the reply. “Last year they were celebrating their 9th.”

There were signs everywhere stating that alcohol was prohibited! If we go back again next year, I told David I will *not* camp near that unit again!

The other unpleasant part was that we were set up very near the main road that goes through Jacksonville. Motorcycles, sirens and many, many train whistles spotted the night. During the day it wasn’t as noticeable but at night it kept us awake and startled wee Judah from his slumber on more than one occasion. On the other, far side of the park the Confederate camp enjoyed comparative peace and tranquility. I was very envious of their ideal situation. Sigh.
Despite the less than ideal neighbors to the West and the main road behind us it was a beautiful park and we had very pleasant weather. I heartily enjoyed being able to cook for my family over a fire, do dishes and haul water. At most events of late I have had really nothing to do besides watching the children and it was an enjoyable break to be able to fill up my idle moments with manual activity.

Little David was upset the first night but by Saturday morning was used to his new temporary home and found great pleasure in walking around the tent, looking beneath it, and exploring inside of it. He also enjoyed visiting Bob’s tent where a bamboo mat was spread on the floor. He couldn’t get over the feeling of that beneath his darling little toes!

Judah most enjoyed the food, the striped candy stick one of the sutlers gave him, and splashing in the water in the metal tub for his nightly baths.
On Saturday I walked with David up to the center part of the park. He lined up for pay call and much to my astonishment each soldier received five gold colored dollars in a small muslin sack. I can’t imagine how much money the organizers put out to be able to do that for each soldier! It was interesting to watch since I have never seen that done at an event before.
My mother in law and I went to the fashion show, held in the hospitable shade of several trees with an ornate gazebo beyond with punch and cookies for the ladies. I was startled but flattered when a lady approached me and asked me to be in the fashion show with the babies! This has been my 2nd fashion show ever! And the second one in less than a month!
After the fashion show we went to sit near the edge of the battlefield. Soon after the start two ladies in a federal cavalry unit fell off of their horses almost simultaneously. For a minute it was unsure if it was part of a staged stunt, or if it was real. At last the battle was halted and those who had medical training rushed out to make sure if the ladies were all right. One lady was hurt worse than the other was motionless on the ground. An ambulance was called and she was taken away to the hospital, later reported to have had a stage 2 concussion but otherwise all right.
The second lady was borne away on the federal surgeons stretcher.


As I watched David direct the stretcher bearers to the wounded lady my eyes filled with tears as they rushed to her. This situation was not a play act for the amusement of the crowd and enjoyment of the participants. It was real. They carried her off the field and to a place where another ambulance later came to pick her up. She was awake, conscious and moving but had to be checked out just in case. She was later released from the hospital with only bruises and scratches.

As I watched all this I was filled with a wonder as to why people reenact the Civil War. I do not reenact because of the battles, I do it because I enjoy dressing in period clothing and trying to experience a little what a lady and mother of the time might have felt as she cared for her family in a way so foreign to modern sensibilities. (or should I say, modern insensibilities). Yes, the battles that are reenacted are for the most part safe. But it is a little odd to see men rushing towards each other, firing at each other, with huge smiles on their faces, laughing, talking to each other. Was this the way the war really was? The way the whole atmosphere changed when those two ladies were hurt was chilling. What if men really were shooting at each other to kill each other? What then? Why do men make a play act out of something so horrible? Why do people come out to watch it and cheer and clap? Would the veterans who actually fought in this war appreciate the way their sacred sacrifice is being remembered?


Saturday evening we drove a few miles away from the park to a beautiful old dance hall with a luxurious surrounding porch for the ball. The floor was a glossy wood one - no gym floors this time! The dance mistress had on a beautiful sheer gown and the live music was rendered beautifully from the musicians. We stayed only for a little while since the babies were fussy but I thoroughly enjoyed my time there and look upon it as the highlight of the weekend. It was truly a “magic moment” for me to be there in that beautiful place!

On Sunday we went to the outdoor church service, ate lunch, watched the battle and then packed up and came home. David and I got to spend a little time alone together before the battle as his mom offered to take the babies for a little while and Bob napped under the shade of the fly. It is so unusual to be with David without the little ones around! We walked around the park and sat at a table to listen to a gentleman who played banjo and guitar sing some songs of the period.

My overall feelings about this event are mixed. I enjoyed some of the activities that went on but didn’t enjoy other aspects of it, such as the location, some of the people, most of the sutler wares and the food stands that sold hot dogs and pepsi and funnel cakes.
David’s thoughts are that we will only go back if he goes as part of his medical unit (we went independent this year) or his artillery unit.
There are other events around here that we enjoy much more and that do not have any of the unpleasant things that we experienced here.
So thus, we are home. And looking forward to our next event, rather than looking behind us at this one.
Love,
Sarah

Monday, June 16, 2008

Almost Done

I can't wait for David to get home tonight! I'm absolutely starving and I've decided to make Corn Dogs for dinner. The thought of corndogs struck me as I sat sewing on the big bed, window open, listening to the neighborly sounds of the evening and the smell of someone cooking hotdogs outside.

We were going to have chicken. But, we can save that for a different day. I have the most fantastic recipe for crunchy, sweet, salty, unhealthy and utmost fattening corndogs. The last time I made them was last year so I think once in a while it is okay to splurge and have something absolutely delicious without worrying about what it's doing to your body! :)

I got most of my mother in laws dress done today. I still have the hooks and eyes left to attach and the skirt needs to be turned over at the waist, pleated, and whipped on to the bodice. And then the whole thing must be hemmed. But that won't take long and for the most part the dress is done.

It came out pretty much as I had imagined. I did add some bias ruching on the sleeves. I thought it might be a little much on the bodice since my mother in law is well endowed and doesn't really need any more emphasis on what's already there. She has a lovely, womanly figure that doesn't need enhancing in any way!

I decided to make open undersleeves for the warm weather of central IL during the summer months. They will make it much cooler for her and when autumn arrives we can switch out the open undersleeves for closed cuffed sleeves and perhaps change the white bows for black ones, to make it more in keeping with the particular season. I don't know if "seasons" were something followed by fashion in the 1860's or not, but to me it makes sense to wear darker colors in the cooler months just for practical reasons.

I made the collar of the same lace as the undersleeves. I had to work with a straight piece of lace to make a curved shape collar so I made a paper pattern for the collar using the bodice and laid out the edge of the lace against the edge of the pattern. Then I pinned up the excess at the neckline in tiny darts and sewed them down, trimmed them and pressed them open. The entire thing was well starched and I sewed it to a bias band and basted it into the neck of the dress. Finally, I tied a bow out of the white silk and pinned it at the neck, to see what the effect would be. Thoughts: The bow is a little droopy and wimpy looking. I don't know how to stiffen up the silk anymore since it is a slippery silk. For this weekend it will have to work but after that I might make a new bow and sew it into a tube and turn and press it, with an interlining of white cotton to make it have more body. Then I'll make the new bow from that.
All right corndogs, here I come. . .


Love,

Sarah
Tuesday, June 10, 2008

A Cap At Last


We talked of the new cap all day; what gowns it would suit; whether a certain bow was not rather too coquettish for a woman of Miss Pole’s age. ‘No longer young’, as she called herself, after a little struggle with the words, though at sixty-five she need not have blushed as if she were telling a falsehood. But at last the cap was put away, and with a wrench we turned our thoughts from the subject.”

With the advent of this years reenactment in Jacksonville looming closely in the future, and with my mother in law having decided to come with us this year and her in need of a new gown for Sunday - well, with all that, I have been busy all this day with thinking about what to make her and how it should look and how it will suit her.

Nothing is quite so delightful as musing over the wretched pleasures of fashion. This color, and that style, and this bit of trim here, and that bit of lace there. Even though the fashions in question have been dead these 145 years (or more!) they must have some merit if they can keep me so preoccupied even in this modern time!

Although we decided today on making a new bodice to my mother in law’s purple flounced skirt I couldn’t find the front bodice pattern when I looked at the patterns I had draped on her a few months ago. She is going to bring over her cotton day dress so I can trace the front of it and make up a new pattern for the new bodice but in the meantime I’ve been working on a cap.
While cap hunting I found several illustrations of caps on ladies, both appearing to be young and old, from the 1850’s onward. All looked similar in that there was no noticeable height to the crown and width seemed emphasized more than length. I suppose, to correspond to the wide, flat hairstyles of the day.
She is of the right age to wear caps, and I am so glad! Today I made my very first one as a practice cap, just to see if I could get the shape right. I cut out an elongated diamond shape from the striped cotton I made my corded bonnet of and for trim I just sewed on a row of wide lace at the edges, tucked a little so it would lay flat. Then I covered the row of stitching with a row of narrow cotton lace. Finally, I made three bows out of some dark green ribbon and tacked them on three of the points. So simple! So easy!

I decided to go with this style of cap since even though her new bodice will be the “Muslin Body” from 1857, I will update her look a bit with an up-to-date cap from an 1861 illustration. This same shape I saw in some illustrations from the 1850’s as well. So it seems anywhere from the late 1850’s - early 1860’s is an okay time for this style of cap. In the book Cranford by Elizabeth Gaskell there are numerous mentions of caps. It seems that even if a lady wore an older style gown she put great importance on having a fashionable cap each year!
This was also one of the simplest shapes I saw in the illustrations. Some of the caps are so covered with lace and ribbon you don’t know WHAT the shape is, under all that frou frou!
I’m selling this one and will make hers the same style but with peach colored ribbon instead of the green. I don’t have any fiber appropriate lace for it though. . .I’m not sure if I’ll just use the synthetic lace or go with a narrow cotton lace edged ruffle instead. I don’t know of anywhere to get real lace that wide.
Anyway, at last I got to make a cap. It was delightful.

Thursday, June 5, 2008

A Tear Dress for The Pow Wow


This weekend is the annual pow wow at the Grand Village of the Kickapoo. For some reason it is not a highly publicized event, even though it is only about ten miles from here on a gorgeous stretch of hilly land with wild grasses, flowers and a herd of buffalo. Back when it was a public park David and I often used to go there and enjoy the peace and solitude. At night the stars glittered in an endless bowl above us - as far as we could see, nothing could obstruct the view. Unfortunately the park was sold a few years ago and is no longer public and the pow wow was in jeopardy, but at last the new owners agreed to still allow the gathering of the tribes each year, in June, as before.


No native blood flows through my European veins, but David’s great-great grandmother was a Cherokee lady. I still often protest that I have no native blood when he talks about “our people” but he insists that since I am married to him, and we are united and one, that I am just as much Cherokee as he is. In a way, I suppose he is right.


Two years ago we planned on attending the pow wow together. David wanted to show me the various goods that people sold there and wanted to go ‘in dress’. I desperately tried to research what I could in the few weeks I had before the event to try to get an idea of what accurate Cherokee dress would have been like. My findings were not satisfactory to me. It turns out, there is no accurate dress for Cherokee heritage, at least accurate to the historical fact of things.
This grated annoyingly upon me, but I had to accept that unless I wished to dress in ancient Cherokee dress I would have to make a Tear Dress, which is the accepted “Traditional Dress” of Cherokee women. Since I did not have the resources to gather skins to make a thigh length, sleeveless shift and had neither bark nor other plant fiber to weave into a fringed skirt I went to Wal-Mart and bought 4 yards of a cranberry colored calico.

The construction of the Tear Dress is interesting. (pronounced “Tear” as in “Let me tear this in two” rather than “Tear” as in “He will wipe away every tear from their eyes”. ) I made my dress following the article and instructions from The People’s Path website. The Tear Dress was created in 1968 for a young lady who was Miss Indian America. Although the style of this dress has definite historical roots there is nothing to indicate it was a chosen or preferred style for Cherokee ladies after white domination. In fact, most Cherokees dressed as white people and followed current fashion lines and lived, for all appearances, as white people.

So, the tear dress was made and later adopted as traditional dress in order to avoid the embarrassment of NOT having a traditional costume. The Tear Dress was adopted for women and the similarly styled Ribbon Shirt for men and children.

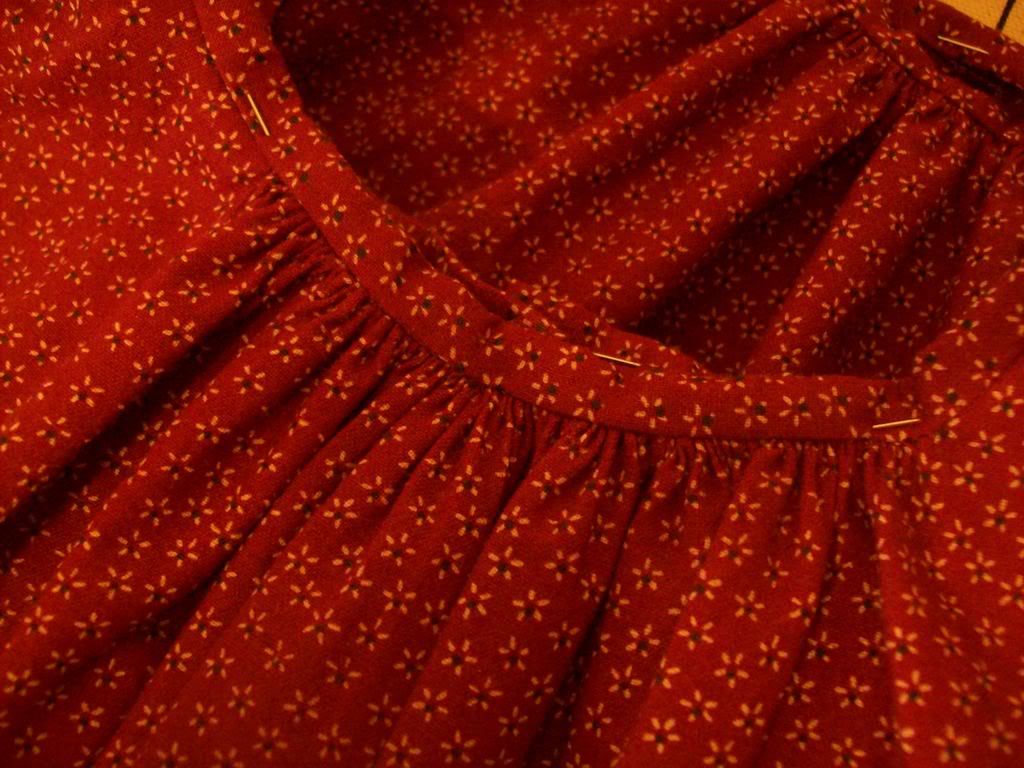
Every piece of this garment is a rectangle. (Or, supposed to be.) Based on advice and opinions from the article I used as my main instruction for creating this dress I made the yoke with fitted shoulders to avoid a large fold of fabric under the arms and I cut the collar in a curved shape, using the collar pattern piece from Folkwears Gibson Girl Blouse. Otherwise, everything else is a rectangle or square. The pieces are gathered and sewn to each other, with the ruffled area created by gathering sticking up as a decorative appearance. The trim is supposed to be applique bands but ribbon is often used. I decided to forgo both the applique and ribbon and used some lace instead. Hey, it’s not historically accurate anyway. And I like lace. :)

The dress can be made full length or mid calf length. I chose to go with the shorter length for practicality. This shorter length was also described as being more flattering to younger, more slender women (and alas, I was slender back then, even though pregnant with little David), and longer ones were supposed to be more flattering on more generously proportioned ladies.
Well, after my research and speed sewing we ended up not going to the pow wow that year. The reason was because the park had just sold and the pow wow had been cancelled. But now it appears I will finally have a chance to wear this to where it was originally intended to be worn, and I pulled out this old dress today and pressed it and got it ready for this weekend. Thankfully it still fits since the only restrictive area is the waistband, which still can squeeze my squish able flesh in enough to make it look all right. I plan on making a white petticoat with eyelet trim to wear underneath it.

For shoes, I found these knee-length moccasins my mother in law gave me last year. A thrift store find, they fit almost right, being just a bit too large. That can be remedied with thick socks and with some of David’s mink oil to freshen them up and some tightening of the stitches around the toe area they will work nicely. Apparently the shorter ankle length moccasin was more common among the Eastern Woodland people but the shorter moccasins I have need resewed since I wore them to death back in my college days.

I have two sashes I am thinking of wearing. Original Cherokee sashes were woven in a method called finger weaving. I have two woven-ish sashes although they look nothing like finger woven ones. One is coarse and kinda vintage 1970’s looking (hey, that would tie in with the First Cherokee Tear Dress though!) with beads.
The other one is a plain cream colored sash with fringe. The thing going for this one is that it is longer than the first one and is more comfortable to wear.
For a hair do I think I’ll pull back my own hair in a bun and wear my Civil War hairpiece, just uncoiling the braided bun into a single long braid, pinned it over my own hair. Original Cherokee ladies (pre White Domination) had long hair “clubbed up in ribbons” so maybe I will wind a ribbon around the braid to decorate it up a little.

Babies shall wear their Civil War gowns, David wants to go in Confederate uniform since during the Civil War there was a regiment of Cherokee men who fought for the southern cause, but I am trying to convince him to wear a ribbon shirt. He objects, strongly, saying they are “fairy looking” (otherwise girly looking).

Anyway, hopefully it won’t be too hot! Well, this ended up a long-winded post. Alas.
Love,
Sarah
Tuesday, April 29, 2008

1845-1855 Ruffled Baby Cap


Today I made Judah a baby cap. At seven months, maybe he’s a little too old to be wearing one but I decided it was for him after it was all done and he kept on his head for pictures. It was supposed to be for my Etsy shop but I can make another. Little Judah can have this one.

The cap is based off of one that is dated 1845-1855 from the Wisconsin Historical Museum Online Collections. The original cap is made of a sheerer material than I used, but I wanted to test out the shape and all that. I made a bunch of sketches the other day from looking at all the baby caps on the WHM site and will be trying them out. While most of the shapes seem incredibly simple the ornate embroidery and lace insertion on many of the caps is truly breathtaking! There were a few caps that were very plain, however, one with just a narrow lace edging around the face.

This cap is one-piece, with a ruffle around the entire thing, and the fullness is taken up at the neck and face with drawstrings.

Here is the pattern I drew out to make the cap. Just print full-size. (I really need to get the Adobe program for these sorts of things but am loathe to spend the money on it since I don’t know how often I would be using it!)

Cut 1 cap on the indicated fold line. Sew right sides together, finish seam in preferred way (I just sewed two rows of stitching close together and trimmed the seam allowance, since this was pretty much a ‘practice’ cap).

Make the ruffle by cutting out a strip 2.5” wide by 72” long. Sew into a circle. Hem one edge of the strip and run two rows of gathering stitches on the other edge. Draw up fullness, pin to cap and stitch, right sides together. Remove gathering threads and press seam allowance to inside of cap.

Cut a strip of fabric 3” wide x 35” long. Sew into a circle. Pin to cap, right sides together, with ruffle turned to outside of cap. (you will be making a ‘sandwich’ of the cap and casing strip, with the ruffle as the ‘filler’ in this step). Stitch to cap.

Make eyelets in casing strip were indicated on pattern. (2 at center back, and one at each chin edge).

Turn under raw edge of top of casing, pin to cap and slip stitch into place.
Take drawstring, and thread one drawstring through the face edge, with each loose end emerging at the eyelet at the chin edge.
Cut two smaller drawstrings. Thread one through one center back eyelet to chin edge. Secure edge of drawstring firmly inside casing at chin edge. Repeat for the other side.

Draw up drawstrings to fit the baby.

The End. :)
Love,
Sarah

Thursday, April 10, 2008

Progress

Another very rainy, windy day. I had a visitor this morning and the young lady who comes over each Thursday for guitar lessons didn’t come this afternoon so I used that time to work on my projects a little.

First, I got the drawers done. The worst part was picking out the seams. I really hate picking out seams! It seems like you are taking a step backward, but at least the finished product looks better! Two pairs down, two to go.

Then I replaced several tapes on my cage. I have the 108” cage from Kay Gnagney’s kit but after a few years (this year will be my 4th season wearing this cage) the tapes are raveling and coming apart. I made new tapes out of strips of muslin on the straight grain, with the raw edges folded towards the center of the strip. The strip was doubled and stitched together, creating little pockets in which the individual hoops rest. The hoops were sewn to the pockets to prevent shifting. Two tapes down, seven to go.

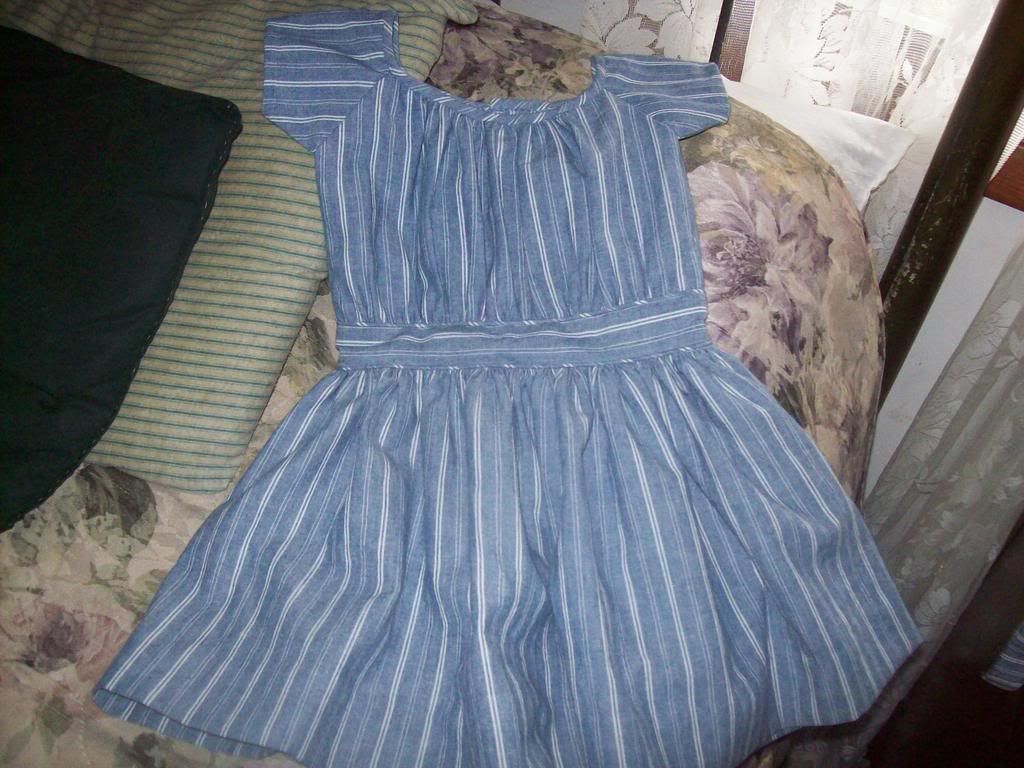
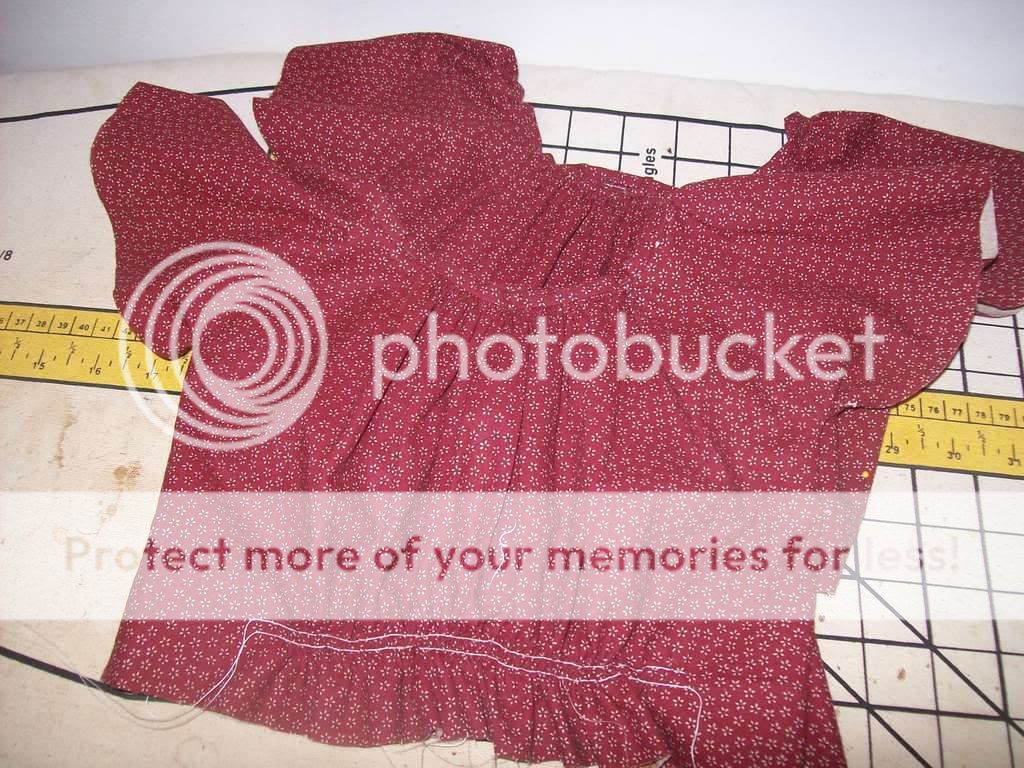
Then I cut out the bodices and skirts for the babies new dresses. I decided to make the usual gathered bodice and the sleeves are rounded at the hem to make a flutter-type sleeve. I meant to copy this sleeve style from an original dress, but failed to look again at the pictures before I cut out the sleeve. I realize now the hem shouldn’t be circular but cut straight. At least, that’s what the picture of the original looks like to me. Oh well. It’s too late to go back and redo the sleeves now. They will just have to wear them that way. On these dresses I am putting the extra bodice length in the waistband so I don’t need to make tucks in the bodice. The skirts will have a deep hem and ½” tucks. Hopefully I’ll get the bodices finished tonight and the skirts and fasteners done tomorrow. I know I should have done the gathers by hand but I didn't. :( I just don't have the time. Alas.


Saturday, April 5, 2008

Baby Bonnets

It’s been a lovely Saturday! It is warm, breezy and spring-like. David got off work early and came home early and we are going to go take a walk with the babies here pretty soon. Then fish for dinner. Yeck. But I promised David I’d make it since we compromised a few nights ago. He has a thing for fish. :)

Today I made the babies pinafores and bonnets. I used Elizabeth Stewart Clark’s 1-2-3 Pinafore instructions from her website. For the bonnet I browsed the Wisconsin Historical Society website and found a simple shape I liked. I was originally going to make corded bonnets, but lack the time. After I found the bonnet I wanted to copy from, I measured the head of my oldest child. Based on his measurements, a quick drawing of what I thought the pattern pieces should look like and some trial and error I drew out a pattern. I usually just draft right onto the fabric but it is inevitable that later I wish I had saved the pattern because I want to use it again. Why has it taken me almost ten years to learn that? I can be so thick-headed sometimes!


I used left over pink print for Davey’s sunbonnet and Judah’s bonnet was recycled from an old shirt of his papa’s. I put drawstrings in at the neck so they can be adjusted. They are a little big now so should last a while. I now need to starch the living daylights out of them if I don’t want them to be floppy. I might just quick quilt the layers of brim together on machine instead, though. I really am not big into starching. (I know I should be, but I just haven’t gotten to that point yet.)

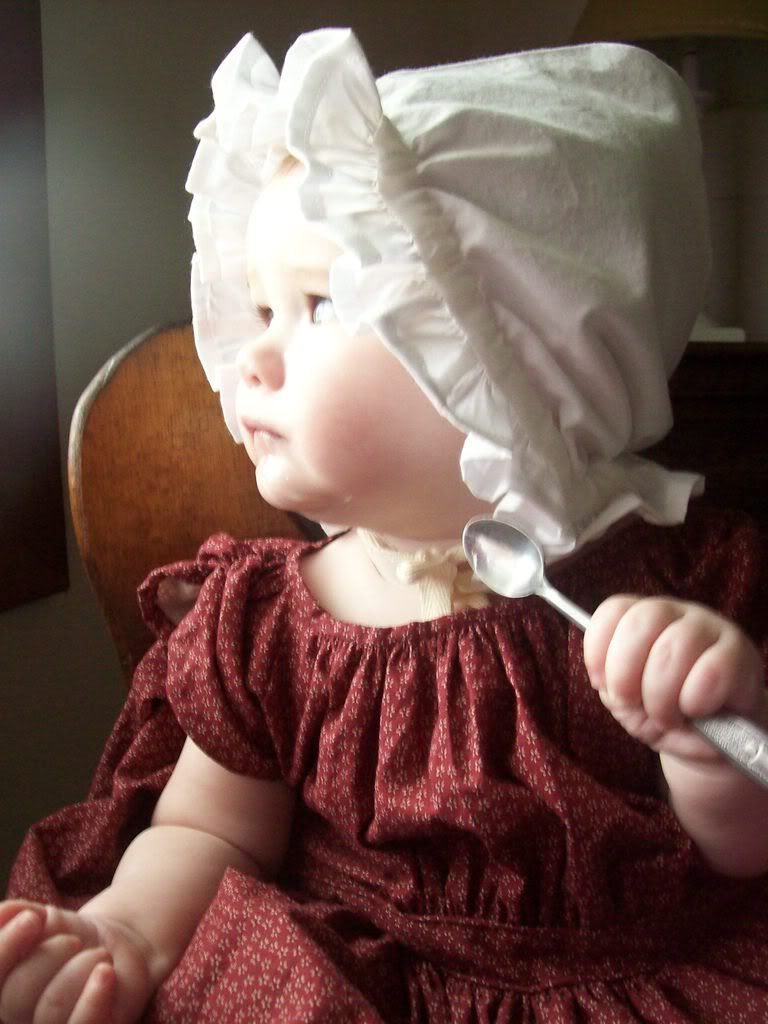
Here is little David in his bonnet. Sorry for the blurry picture! He just won’t hold still! Surprisingly he seemed to actually like wearing it and I wanted to get a picture of how it looked on a head.

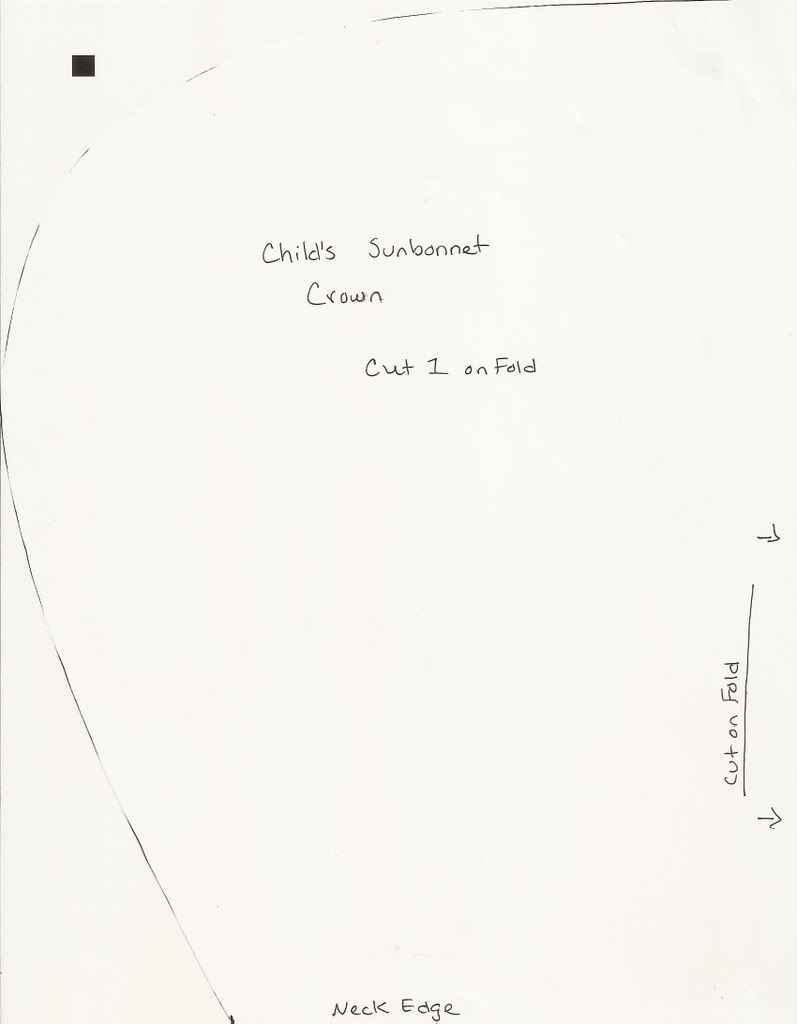
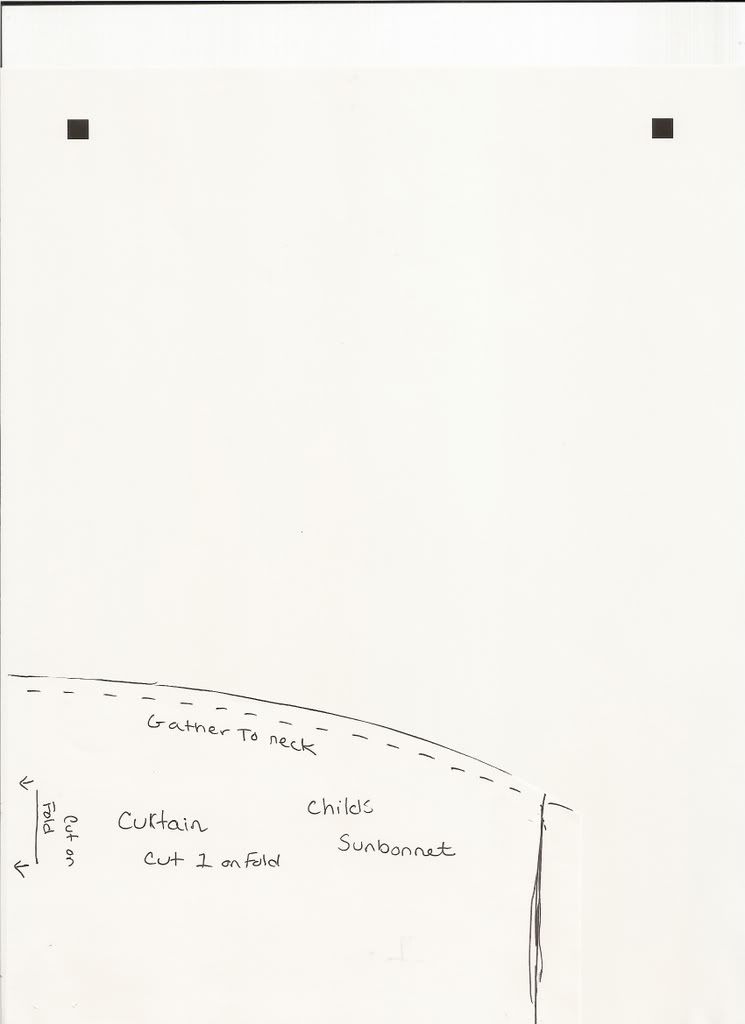
If any of you all are interested in making one like this, I scanned the pattern pieces. They are here:
Just print full-size on a sheet of regular printer paper. :) Oh, and um, I don’t know if making the curtain piece wider in the middle is period correct or not. I just did that so as to shade the back of their necks better but not have really long curtain pieces over the shoulder/neck. You could just make a plain old rectangle too. :)

I’m off!
Sarah

Friday, April 4, 2008

Judah Baby In His Dress

Well, instead of making pinafores I decided to try the dresses on the babies and take pictures. Little David was NOT cooperative, prefering to try to tip over the rocking chair on which his brother was seated (and, alas, almost suceeding). Here is little Judah, who now can sit up and who also has his first tooth! I don't know where his other arm has disappeared to in these pictures but I assure you he has all his limbs intact. :)

Tuesday, April 1, 2008

Oh Scallops, Scallops. . .

I was very happy with the progress I made on the dresses today, in-between playing with my sweet wee ones and putting the drawers back in my sewing desk that the baby decided to take out and empty, and hunting high and low for my spool of white thread that the said baby made off with and deceptively Hid from me. He prefers real things to toys. After all, they are more interesting. It is very interesting to unroll thread from a spool, undoubtedly!

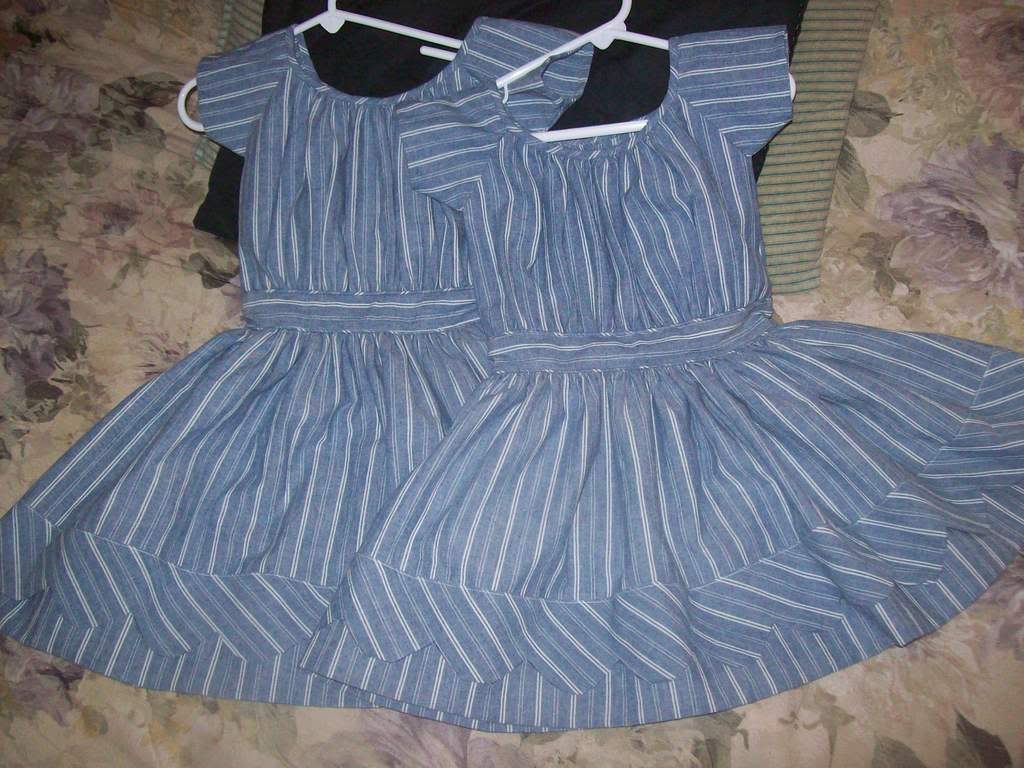
The skirts were easy to set on. I used a full width of the 60” wide fabric for the skirts. I was afraid 60” would be too skimpy but they turned out just fine. The material is a little heavier, anyway, so the stiffness makes the skirts stand out nicely. The scalloped band was incredibly fun to make.
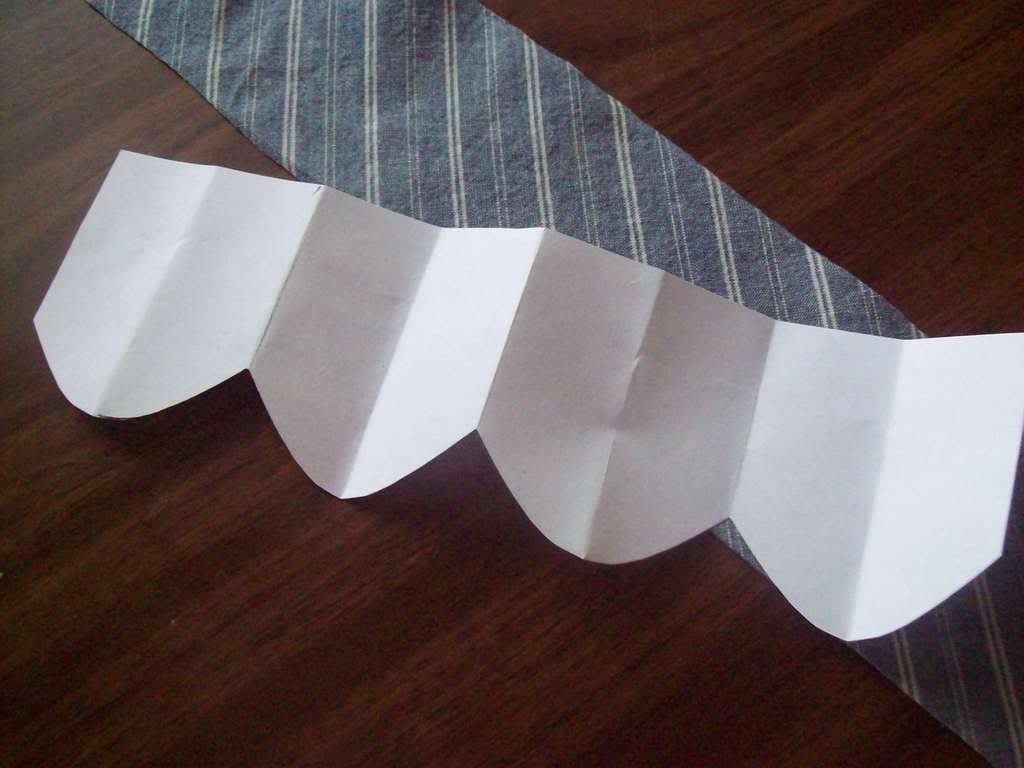
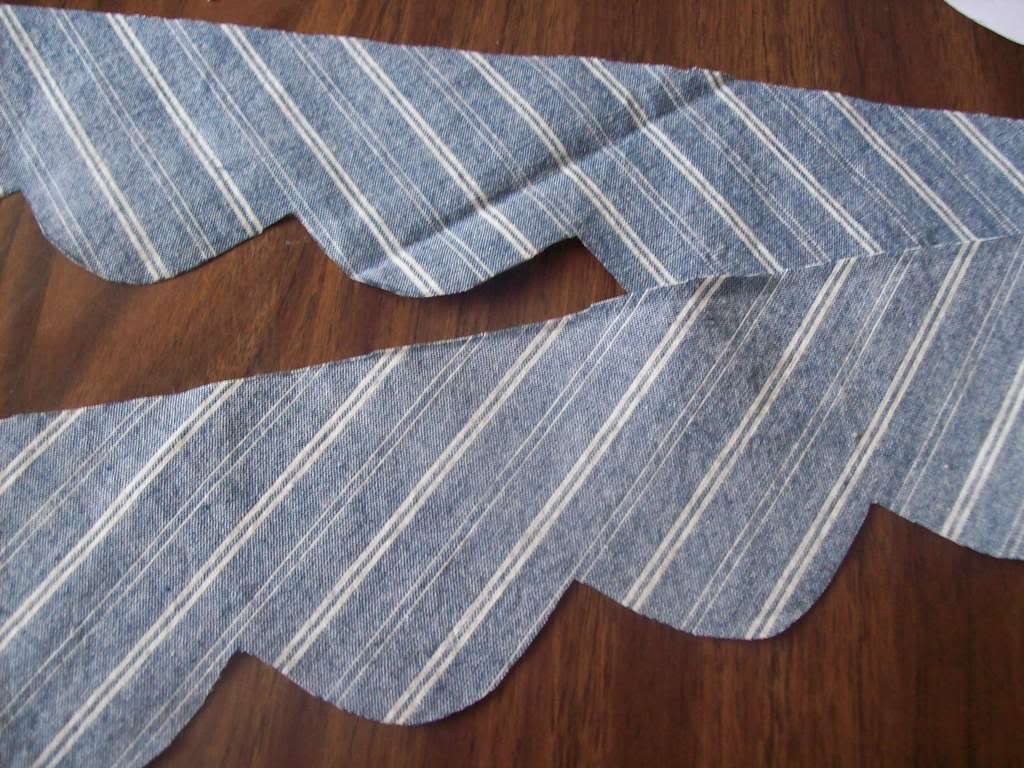
First I made a template like this, by folding a piece of paper into eighths and then drawing half of the scallop on the fold. Cut out the scallop, and there you go! A template.
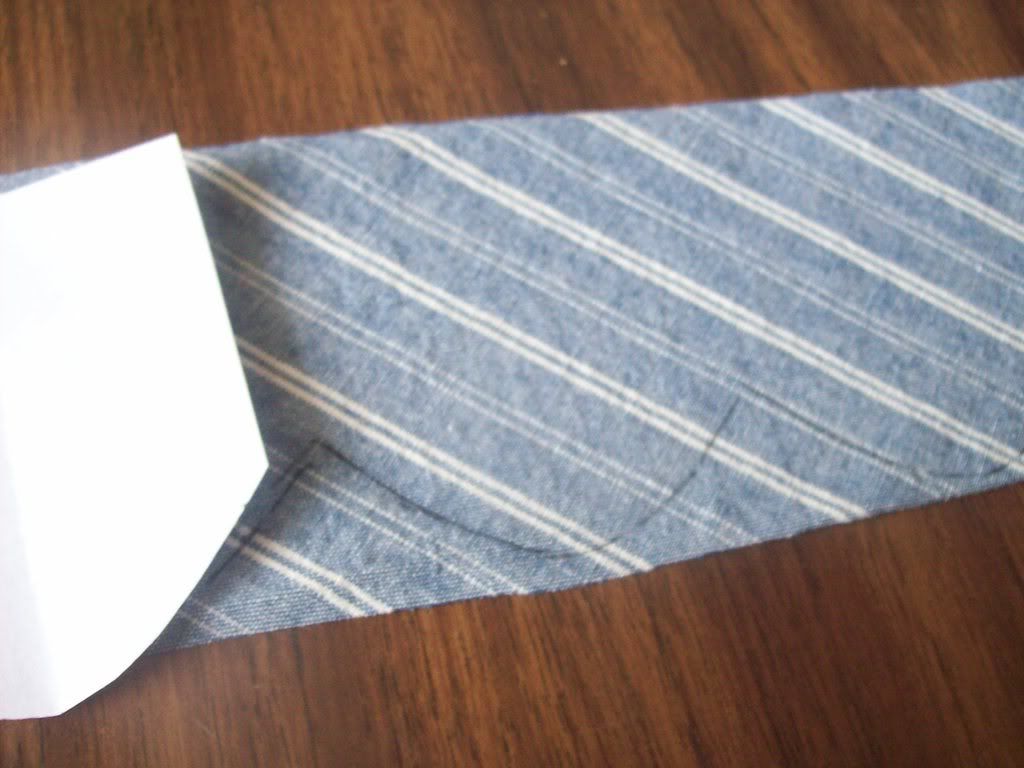
I then traced the template onto the strip of bias fabric (3 ½” wide)
And then cut it out.
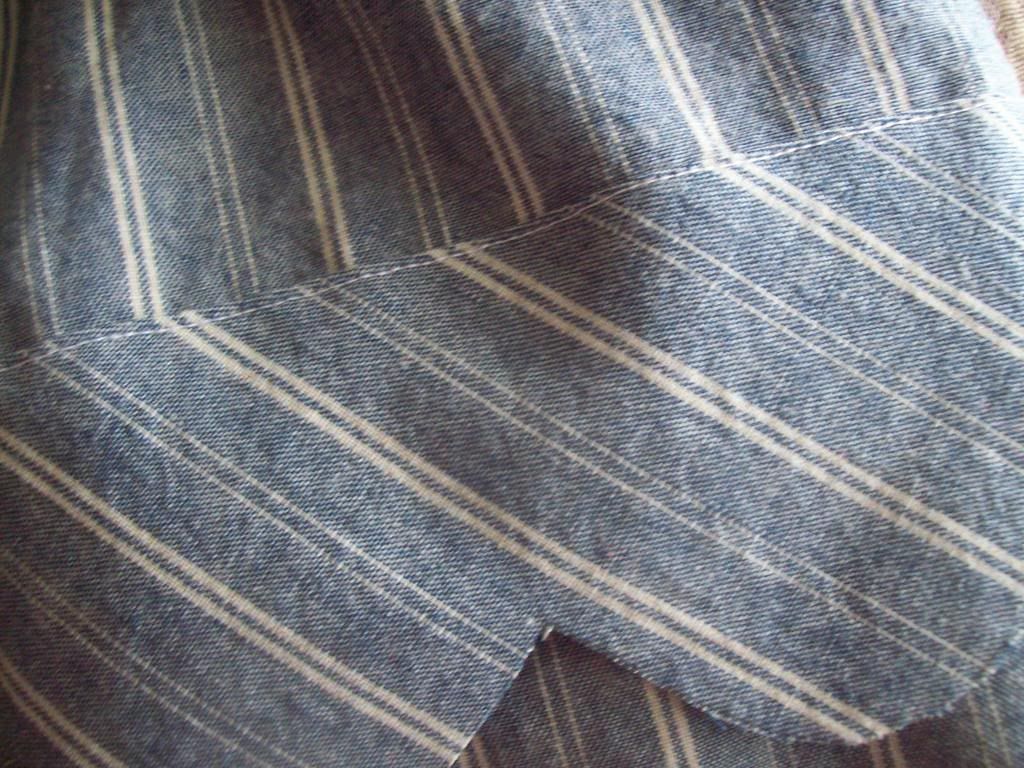
Then I folded over the top edge of the bias band and stitched it to the skirt.

I still am not sure how to actually bind the scallops. I tried several different methods earlier but none of them worked out. I’m thinking the self fabric bias binding I made is just too heavy because of the weight of the fabric and I might need to make binding out of a lighter fabric, so in a nice trim color. White? Red? Black? I think perhaps black and red would look nice and boyish.

And here they are with the band attached. I think the band really makes the dresses have character and makes them different from just a plain old dress.
That’s all I did for sewing today. I still need to add buttons or hooks to the backs of the dresses, but I don’t have any appropriate buttons right now and I don’t have any hooks either. Hmmm. I think a trip to the fabric store is in order tomorrow when we go into town!
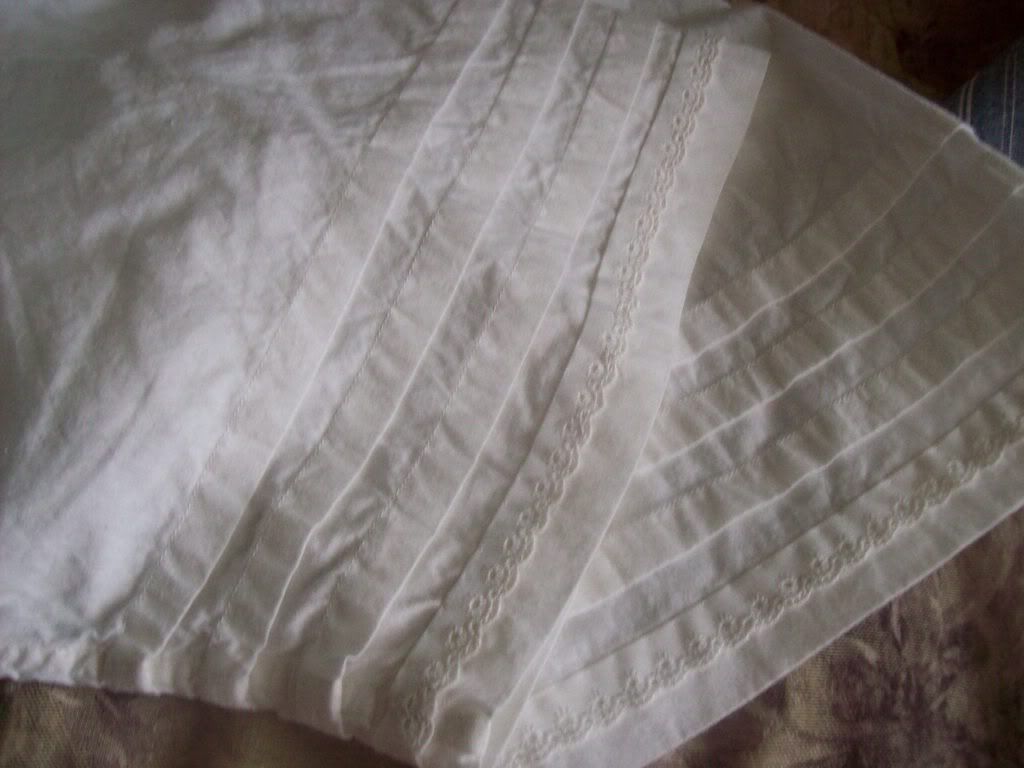
Here is a picture of my finished drawers.
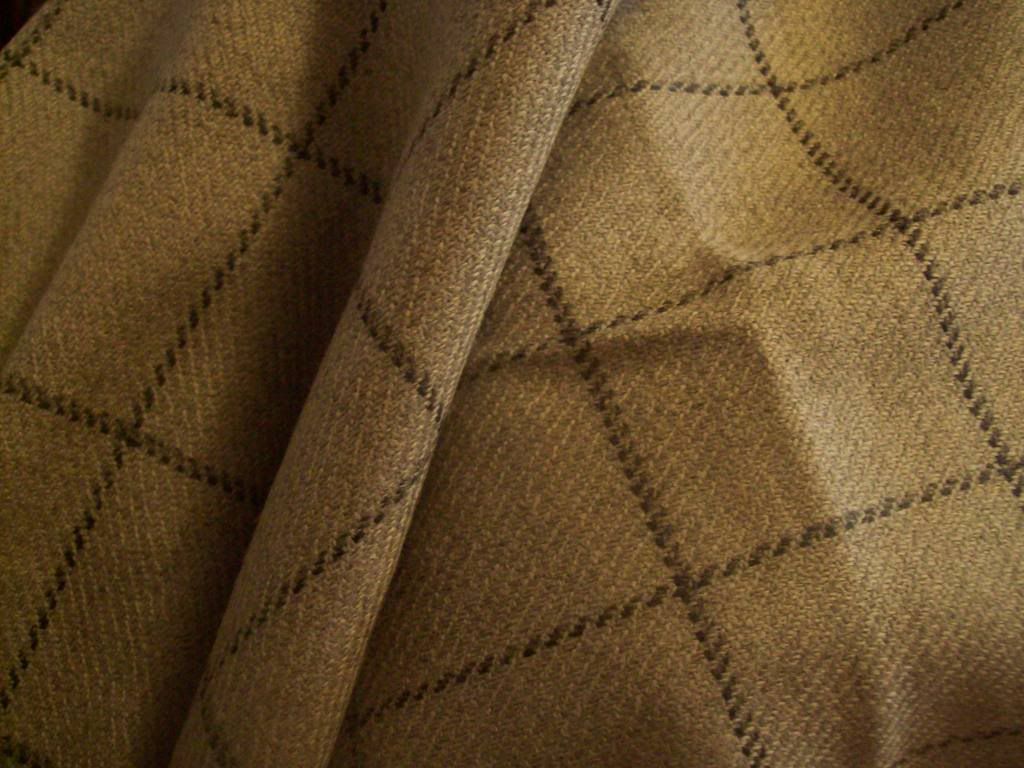
And some of new fabric I recently got. Plaid silk, and some wool from eBay that was intended for baby coats. Alas, the wool is really too heavy for baby coats. I think I’ll use this wool and the babies will have coats made of my green flannel cloak that I intended to take apart and remake into something more appropriate for the 1860’s. I REALLY want to get the silk made up for my Sunday dress before our first event in a few weeks, but I don’t know if I’ll have time. Hope so! I’ll try! I really don’t have much left to do.