I have long wanted a dressform, but due to the high prices of new ones and the somewhat bad reviews I've heard of the cheaper new ones, I have long thought that a dressform was not in my near future. I put out wanted ads for old ones, looked at thrift shops and garage sales but antique ones were often as much as new ones and thrift stores tended to want to keep the ones they had, to display things on. I made a duct tape dressform once, with the help of my mother. That kind of flopped. Literally. The duct tape figure was really heavy and it was almost impossible to stuff and when at last I got her nearly done, the figure was not at all the same as mine and the measurements were off. She died a quick and painless death.
After brainstorming a bit I recently came up with the thought that I could make my own. Why not? It seemed simple enough. A stuffed figure the shape of a woman, a pole or rod for her to stand on, and a stand of some sort at the bottom to keep the whole thing secure.
So, here are the results of my brainstorming, $10, and 2 hours of work! Meet Miss Mattie, a.k.a "The Naked Lady".

What I used:
Pattern:
Since I didn't care if this dressform was an exact replica of me or not (I plan on using it mainly for display purposes), I used a basic dart fitted bodice pattern (From my 1950 dress pattern) as a base and went off that for my pattern. Below is a quick drawing I did to show how I altered the base pattern pieces. I changed the darted front bodice to princess-seam and added length at the bottom and a high neck at the top. I also made the shoulders a bit wider. I did the same for the back, except it did not have a dart so I did not have to princess seam it. If you don't have a dart fitted bodice pattern to alter I'm sure you could get one at any store that sells patterns. A princess seam sheath type dress pattern could also work very well and that was my plan B, if plan A didn't work. If you want the dressform to be a replica of you, I'd make a muslin first out of the altered pattern and fit it to you smoothly. Use the fitted muslin as your final pattern.

Fabric:
I used about 3 yards of natural muslin for my dressform. You can get this at Jo Anns for under $1/yard with a 40% off coupon. I suppose you could use anything that is sturdy and even weave though. You could even make the form out of two layers of fabric with the even weave fabric as the bottom layer and a decorative fabric for an outer layer. I'm not fancy, so I just went the plain way. :)
Stuffing:
I used about 45 oz. of poly fiberfill stuffing for mine. I got 3 bags of 20 oz. stuffing at Jo Anns for 50% off and used all of two bags and just a tiny bit of the third bag.
Pole:
For my stand, I used a heavy cardboard tube, the kind you can get home dec fabric rolled up on at fabric stores. This worked very well for me, and was free.
Stand:
My darling husband kindly dug out our Christmas tree stand from the storage unit his mom has. We used this the first year we were married and we haven't used it since. It worked perfectly for supporting the cardboard tube and is very sturdy. It's not the prettiest thing in the world so I will probably make a skirt type thing for the bottom of it to cover the green plastic and metal, eventually.
Construction:
To make the form, I cut out my pattern from the muslin and sewed the pieces together, leaving the bottom open. I added a short standing collar to the neck at the last minute since I thought it would look better. To finish off the neckline and arm openings I piped around the raw edges and sewed in a slightly oval-shaped circle to keep the figure of the form. The ovals were slightly bigger than the holes they were sewed into so needed to be eased. This created a nice rounded fullness at the neck and arm openings that seem more realistic to me than a flat surface.

The longest, most tedious part of the construction was stuffing the thing. I used very small amounts of stuffing at a time and carefully tried to smoothly stuff the muslin shell. It took me the better part of an hour to get her as I wished her to be. I stuffed from the bottom, inserting the pole once I got the neck area stuffed. When I got near the bottom, I turned under a 1/4" seam allowance all around the bottom opening, pinned up the hip edges to within 2" of the center area where the pole was, and stuffed the hips. Finally, I stuffed the crutch area and slip stitched the opening shut.

After that, it was a simple matter of inserting the pole into the Christmas tree stand. And there you are! My husband seemed rather impressed but solemnly stated that she needed clothing.

Things I Would Do Differently Next Time:
Next time I would cut the pattern pieces slightly smaller, or take up a bigger seam allowance since the finished figure has measurements that are a bit bigger than my own. Although she is definitely squishable enough for me to put my gowns on her, she definitely fills them out well.
To make a more pronounced derrierre, next time I would take out a dart at the waist of the back pattern piece to create more fullness below the waistline. Since this is a display-only dressform it's not critical right now, but its something to keep in mind for future forms that may need to be made to a certain type of figure.

I also cannot figure out how to make the form anything more than an A-cup. I honestly have no idea, so if any of you know how I could do this, I'd LOVE the information! :) In the meantime, she'll be undergarmented and padded out if needed!

It's nice to have a dressform at last, but also a little startling to catch a glimpse of a figure you are not accustomed to at odd times during the day!
Love,
Sarah


 Instead of attaching the collar to a chemisette, I just bound off the neckline with bias cut strips of white cotton and that is basted into the neck of my dress, just like my 1860's dresses. I don't know if this is P.C. or not, but it works for me and was a lot less work than having to make a whole chemisette to wear beneath my bodice.


.jpg)


 I originally wanted to make this dress with a small jacket over top of it but after looking into this style more, I found that most often a dress was trimmed to look like there was a jacket being worn. Well, that made things a lot easier! I used my basic fitted bodice pattern and lengthened the front a bit to make a shallow point and I added a peplum/postillion to the back. This was a lot of fun since I have never made this style before. I spent a while trying to decide on an appropriate sleeve but at last went with a two-piece coat sleeve and trimmed it with green/blue silk. I used the same silk to trim the bodice, and plain blue for the bow at the neck. I really want a nice brooch so that is on my Christmas wish-list. :)
 I have also been working on a little girls dress for a young lady in our reenacting group. I was quite stuck on what size to make so at last sized up the pattern I used for the boys and I am anxious for tomorrow as the moment of revelation. Will the dress fit?
 I used a heavy pink striped seersucker for the dress. It is not the best choice since although seersucker was used for clothing during the 1860's, it is not documented to have been used for dresses. It is, however, a fabric I had plenty of and since I do not know if this dress will fit yet or not I thought it would be all right to go ahead and use it. If it does fit, I can make another dress from a more appropriate fabric. It is a very thick fabric and has very nice body to it. And a big thank-you to
  I actually broke down and did buttonholes on this dress, instead of taking the easy way out and using hook and eyes. I hate making buttonholes. And now I am refreshed as to my reasons why! :)
 It is COLD. Hope you all are keeping nice and warm!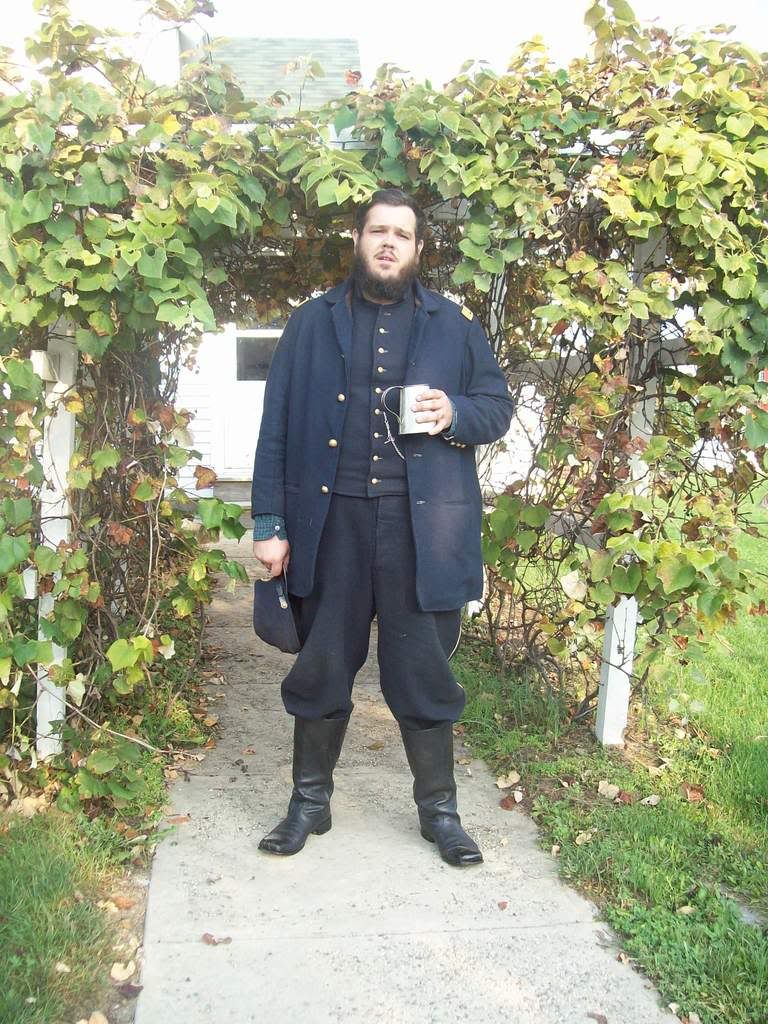
 Saturday greeted us with awakening very early to head over to the event, since David was forced to remake our new rope bed Friday afternoon/evening due to some warping issues with the lumber we intially used. Rather than set up very late at night we decided to go to the event Saturday morning. It was a compromise; we didn't want to miss the first evening there but by staying home we were able to relax a little and watch the debate between Sen. McCain/That Rat Obama and awoke refreshed for the weekend.
 Little David enjoyed walking the intersecting pathways and it was pleasant to have him so interested in an area so close to our camp. Katie, the little granddaughter of our hospital steward, played with the babies and followed little David where'ere he went.
 We brought a wood and canvas frame cot for the babies to sleep on this weekend. It was an experiment for us. I was not sure if they would do well with an open bed since they are accustomed to sleeping in their cribs, or on the ground in a puppy pile at events but they did very well with the cot and I was glad to have them up off of the ground. Judah slept at one end and David at the other, with their feet in the middle. David enjoyed the cot since it was so narrow and snug and took advantage of that for a nap Saturday afternoon.
 Judah and I, while David napped, were invited to participate in the fashion show, held in a gorgeous wood gazebo. We had lemonade and cookies and waited in the cool shade with the other ladies until we were called up. Juhah flirted shamelessly with all the ladies and had his picture taken for the local newspaper. The next day we got a copy and his picture was on the front page, along with the inner location of the article! His picture was also the largest photo in the article. :) This time, the news reporter did NOT botch up what I told her and I was altogether very satisfied with how the article was written. Much better than last year at Princeton.
  In the afternoon I spent a great deal of time at the farmhouse that was a street over from our medical camp. There was a pretty arbor covered in shady vines that the boys played beneath and a large yard fenced in where they could run and play without me having to worry about them running off. It was nice to sit on the porch and talk to the passer-bys as I felt it was a more fitting location for me than the medical encampment. I was able to pretend I was the mistress of the home with my children and the army was moving through my town, the battle taking place a few fields away. It is nice when events have atual historical buildings so such a thing is an option to portray.
 Katie gave little David a green balloon, which he Dearly Loved.
 The photographer was not at the event so we asked a reenacting gentleman to take a picture of us as a family. It is not nearly what we wanted or had in mind but at least it is all of us together! :) We think the photographer will be at our final event in three more weeks since it is close to his actual location and we plan on getting our photo done there. (and yes, I do need to make a longer collar for my blue dress, and no, I don't plan on wearing this one for the pic! Yikes!) :) It does work VERY well though for keeping signs of Baby Smudge from disfiguring my gown since the dark colors are so very practical.

 On Sunday morning we awoke early. While David helped open the church building I took the boys for a walk before services started. My dad let me use this little wagon to pull the boys in. It is not period correct and we have to paint over the "radio flyer" words but it was hugely helpful to me and a better option than our double stroller. The boys enjoyed riding in it as well! Hopefully over the winter we can get a period correct wagon made for the boys. It is almost necessary to have, especially since I will have the new baby next season.
  Just prior to services, David had the privilege of ringing the bell to call the worshipers together. He rang it twelve times, once for each disciple. (although on reflection it could also have been once for each tribe of Israel?)
  The service was quiet, sober, yet full of joy and gladness. David and I both felt that this was the first time in a very long while that we have actually worshipped, as a body with other believers, in a church setting. Since leaving our old church (for many different reasons) earlier this year and off-and-on atttending a different nearby church we have not felt so settled nor so happy to be in a place. The preacher gave out the gospel fully and with no restraint. To hear again of the love our Lord has for us was humbling and convicting.
 There was not much on the schedule for the afternoon but David and Maj. Ron, the surgeon, planned a small scenario for a pre-battle demonstration. David gathered up a few willing victims and worked on his wounds.
  Meanwhile, I examined the medical instruments, papers and medicines laid out.
 At last the crowd had gathered and before them three men had puss cleaned from their wounds. (speaking of which, the "puss" used is really tapioca pudding. Judah saw his daddy using the puddy to make a wound and was unhappy because he could not eat it!)
  We headed up to the battle after that but I soon had to take the boys to a more shady location. We spent a while in the pleasant tranquility of the school yard and David explored the edge of the woods while Judah amused himself with the crunchy leaves that had fallen. A functional outhouse was in the schoolyard and was much preferable to the porta-potties since not many people thought to use them.

 And thus - we packed up in the afternoon and in the glory of the setting sun came home again.